


Stage design sits at the intersection of architecture, brand communication, and technical production. A well-designed stage is invisible—meaning the audience doesn't consciously notice the design, but the experience feels intentional, professional, and aligned with the event purpose. A poorly designed stage, even with expensive AV components, undermines the entire event.
Many organizations approach stage design as a visual afterthought: "What should the stage look like?" They should be asking a more fundamental question: "What story are we telling, and how can the physical environment reinforce that story?"
This guide covers the complete stage design process from conceptual strategy through technical execution. We'll walk through the decision frameworks that separate functional stages from memorable ones, the technical and safety requirements that enable professional execution, and the specific design approaches that work for different corporate event types.
Stage Design as Brand Storytelling
Before we discuss materials, dimensions, or technical specifications, the fundamental question is: what is the stage communicating?
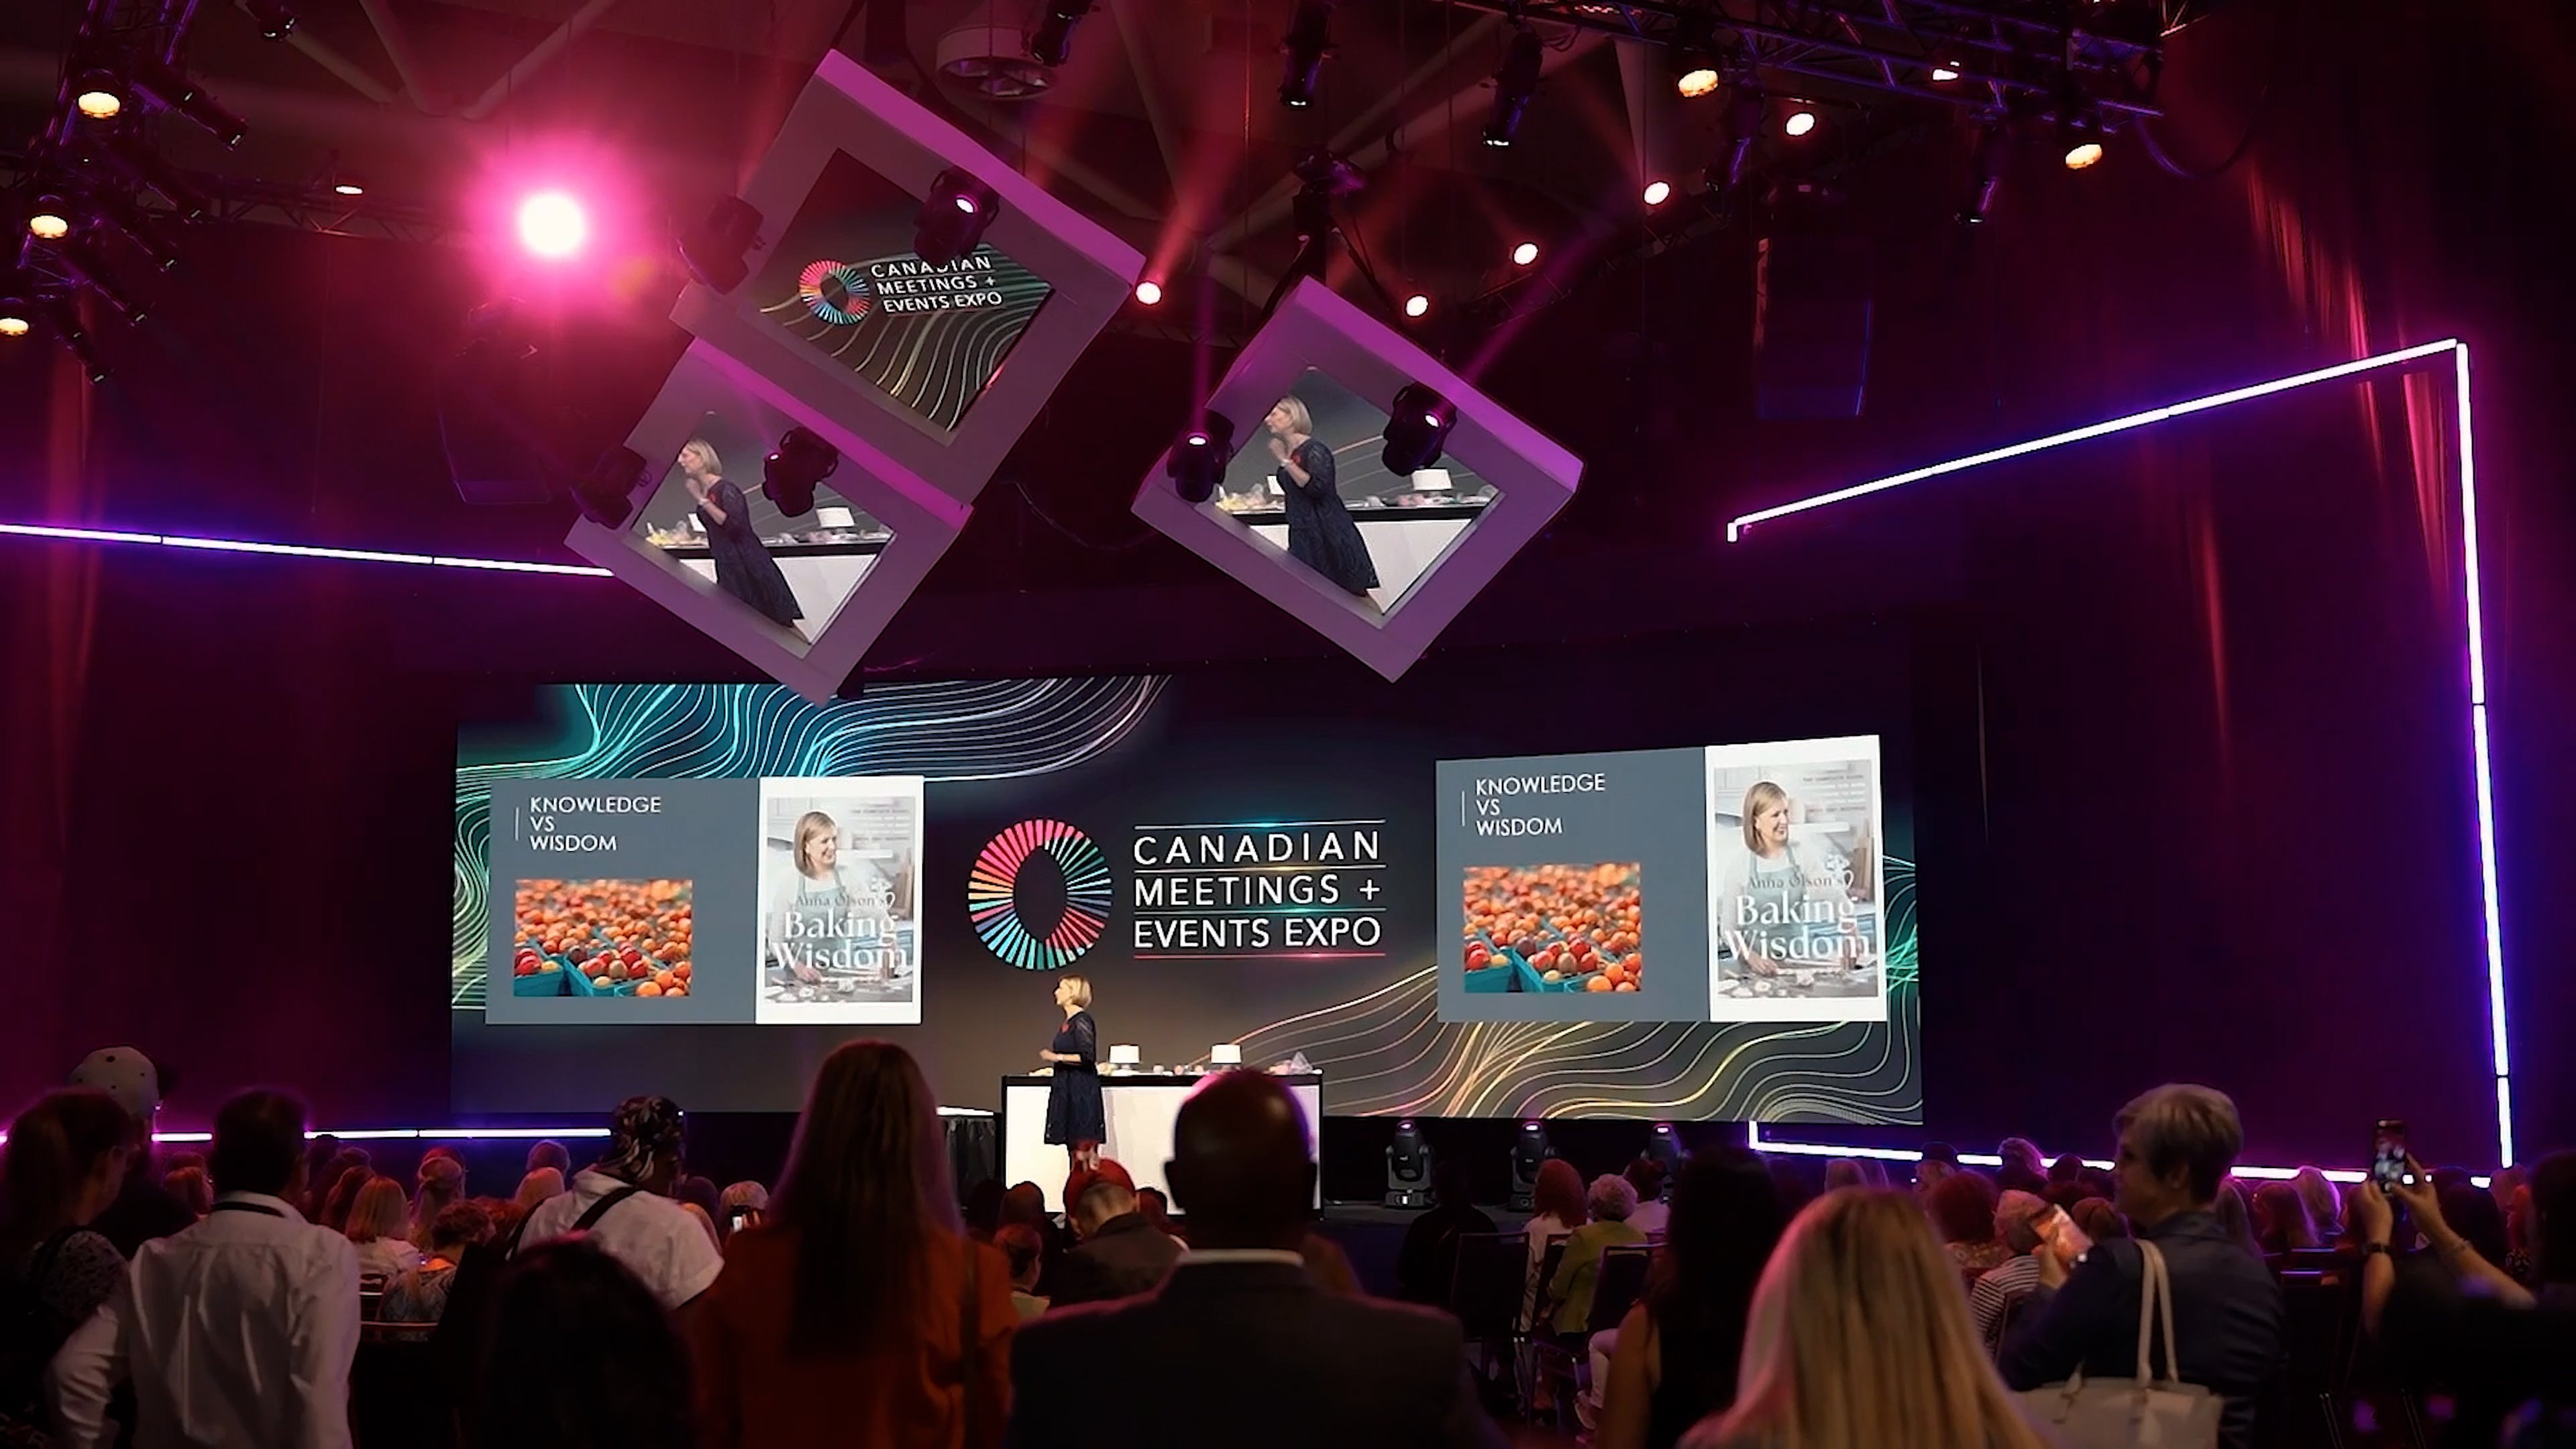
Every element on stage sends a message. The scale of the stage sets the tone (intimate vs. grand). The color palette communicates emotion and brand personality. The use of white space suggests sophistication or minimalism. The addition of architectural elements signals complexity or innovation. The positioning of speakers—whether raised on a high stage or at eye level with the audience—communicates hierarchy and approachability.
Professional stage design is intensely intentional about what the physical environment communicates. A financial services company and a tech startup might both have a CEO speaking the same message, but the appropriate stage design for each is completely different. The financial services company's stage design should communicate stability, trust, and established expertise. The tech startup's stage design for their event should communicate innovation, energy, and forward momentum.
At bb Blanc, our approach to stage design for corporate events starts with understanding your brand and message before we sketch a single design. Every element of the stage—from materials to lighting to spatial arrangement—reinforces your organizational identity.
Effective stage design starts with these foundational questions:
- What is the primary emotion we want the audience to feel? (Energy, stability, inspiration, capability, professionalism, innovation)
- What is the relationship between speaker and audience? (Teaching, celebrating, announcing, inspiring, collaborating)
- What visual elements define our brand? (Colors, shapes, typography, materials, spatial language)
- What is the physical venue, and how does the stage need to interact with that space? (Ballroom vs. theater vs. outdoor venue each require different approaches)
These questions shape every subsequent design decision.
The Design Process: Concept Sketches, 3D Renders, and Technical Drawings
Professional stage design for corporate events follows a structured process that moves from abstract concepts to precise technical specifications. This process is critical because stage design for corporate events requires coordination across multiple disciplines—creative vision, structural engineering, AV integration, and venue management. At bb Blanc, we approach stage design with the same rigor we bring to all aspects of corporate event production.
Great stage design often requires collaboration with an audio visual production company Toronto teams rely on for creative execution. Whether the event calls for gala production Toronto elegance, awards show production Canada scale, or a custom LED wall for events that doubles as scenic architecture, the stage design process must account for technical integration from day one. Your staging partner and corporate AV production Canada provider should be aligned on creative vision and structural requirements before a single piece of decking is ordered.
Phase 1: Conceptual Development
The design process begins with open exploration:
- Mood boards: Collections of colors, textures, typography, and visual references that capture the intended aesthetic
- Concept sketches: Hand-drawn or rough digital sketches exploring spatial relationships, speaker positioning, and visual hierarchy
- Design language development: Establishing the visual vocabulary that will be consistent across stage, signage, graphics, and supporting materials
This phase should include stakeholder input but should not yet be constrained by technical feasibility. The goal is to establish a clear visual direction.
Phase 2: Design Development Renderings and 3D Visualization
Once conceptual direction is approved, we move to more detailed visualization using professional 3D rendering technology:
- Photorealistic 3D renderings: Professional 3D models of stage design for corporate events integrated into the actual venue scans, showing the design from multiple angles and camera positions. We use specialized rendering software (typically V-Ray or Corona Renderer) to ensure color accuracy and material authenticity.
- Lighting simulation: Renderings that show how the stage design will appear under the actual lighting design for the event. This is critical because a stage design that looks great in bright daylight renders can appear dull or washed out under actual event lighting.
- Scale study renderings: Showing how the stage design appears from audience viewing positions. Different seats in the venue have different perspectives; the stage design must read well from all viewing positions, not just from cameras or optimal sightlines.
- Material specification renderings: Showing actual materials, finishes, and color accuracy. A rendering that looks great but uses materials significantly different from what's actually fabricated creates disappointment on install day.
- Virtual walk-through: Animated 3D models allow stakeholders to "walk through" the stage design environment before it's built, understanding spatial relationships and scale.
These renderings should be reviewed by event organizers, venue management, and the technical team (AV director, lighting designer, structural engineer). This is the phase to catch any logistical issues before they become expensive. For corporate event stage design, spending extra time and resources on accurate 3D renderings prevents costly changes during installation.
Phase 3: Construction Documentation
Once design is approved, we move to technical drawings:
- Dimensioned floor plan: Exact dimensions of all stage elements, equipment positions, cable routing, and access points
- Elevation drawings: Front, side, and back views showing vertical dimensions and structural relationships
- Detail drawings: Zoomed views of specific junctions, connections, and complex assemblies
- Materials list: Complete specification of all materials, finishes, hardware, and quantities
- Structural load calculations: Working with structural engineer to verify that all design elements can be safely supported by the venue infrastructure
These technical documents guide fabrication and installation. Ambiguity at this stage leads to change orders and installation delays.
Phase 4: Fabrication and Installation
With approved construction documentation:
- Shop drawings: Fabrication shops create detailed drawings showing how they'll construct each element
- Fabrication phase: Scenic elements are built in a shop environment, painted, tested
- Installation phase: Elements are delivered to venue, installed, aligned, and tested
- Load-in management: Coordination with venue on access, timing, equipment placement, and utilities
This phase is where concepts become physical reality. Quality fabrication determines whether the design reads as intended.
Materials and Construction: Scenic Flats, Acrylic, Fabric, LED Integration
Stage design materials must balance aesthetic goals with practical constraints: durability, ease of installation, cost, and weight limitations.
Scenic Flats and Structural Framework
Traditional scenic construction uses modular wall systems:
- Steel pipe or aluminum frames: Rigid structural frames that serve as the skeleton of the stage structure
- 1/2" or 3/4" plywood skins: Lightweight plywood sheets that attach to frames, providing a surface for paint, vinyl, or other finishes
- Modular panel systems: Reusable framed units (typically 4' x 8' or 4' x 12') that can be reconfigured for different events
- Hardware and fastening: Heavy-duty hardware (bolts, C-clamps, stage weights) that secures scenic elements and accommodates movement/vibration
Scenic flats are cost-effective for shows where scenery will be fabricated, stored, and reused. Custom one-off stage builds are typically more expensive per application, but for long-running events or touring shows, modular systems make economic sense.
Acrylic and Transparent Materials
Modern stage design increasingly uses transparent and translucent materials:
- Clear acrylic panels: Transparent plastic that maintains sightlines while creating defined stage boundaries. Often lit from behind or with internal LED elements.
- Frosted or milky acrylic: Diffuses light and creates visual interest while obscuring details behind it
- Polycarbonate: Similar to acrylic but more impact-resistant, useful for elements that might receive physical impact
Acrylic is expensive relative to painted flats but creates a contemporary, clean aesthetic. Acrylic is also sensitive to thermal stress and scratching, requiring careful handling during installation.
Fabric Treatments
Fabric coverings can be applied over structural frames:
- Muslin: Inexpensive natural fabric, typically painted or dyed. Easy to repair but requires UV-resistant treatment for outdoor use.
- Canvas: Heavier weight than muslin, more durable and can hold texture/detail better
- Specialty fabrics: Acoustic fabrics (useful for sound control), custom-printed fabrics (for branded messaging), metallic or reflective fabrics (for light effects)
- Fabric stretching and fastening: High-quality scenic design uses professional fabric tensioning systems (not just staples) for clean lines
Fabric is extremely versatile—it can be painted, printed, draped, gathered, or layered to create textural complexity. It's also more forgiving of imperfections than smooth hard surfaces.
LED Integration in Scenic Elements
Modern stage design often incorporates LED elements directly into scenic structures:
- LED panels mounted within acrylic frames: Combines transparency with dynamic visual capability
- Backlit acrylic: Clear acrylic with LED strips mounted behind, creating glowing surfaces that can change color dynamically
- Embedded LED strips: Thin LED strips recessed into seams or architectural elements, creating accents or defining edges
- Programmable LED networks: LED elements networked together to display coordinated animations or content
Integrating LED into scenic elements requires planning from conceptual stage through final technical implementation. The scenic fabricator must work with the AV team to ensure proper power, networking, and control integration. This coordination is often overlooked and creates problems during load-in.
Stage Types for Corporate Events
Different event formats benefit from different stage architectures.
Proscenium Stage
This is the traditional "picture frame" stage where the audience views from one direction:
- Best for: Presentations, awards ceremonies, keynote addresses, performances
- Sightline advantage: Clean, focused view of stage content
- AV integration: Video screens positioned upstage (behind speakers) or flanking the stage; lighting positions are predetermined
- Speaker comfort: Performers face one direction; blocking and movement are constrained
Proscenium stages work best when the content is primarily verbal (speeches, presentations) or performative (awards, entertainment). The focused sight lines prevent audience attention from wandering.
Thrust Stage
This is a stage that extends into the audience, typically with audience on three sides:
- Best for: More intimate corporate events, presentations where speaker-audience interaction is important
- Sightline advantage: Audience members sitting on multiple sides see the speaker from different angles; creates a more collaborative feeling
- AV integration: Video screens must be carefully positioned to avoid blocking sightlines for some audience members
- Speaker comfort: Speakers can move and interact with different sections of the audience
Thrust stages create a more intimate feel and can increase perceived speaker-audience engagement. They're less suitable for highly scripted presentations and work better for discussions or more interactive formats.
In-the-Round Stage
This is a stage completely surrounded by audience (360 degrees):
- Best for: Intimate gatherings, dinners, cocktail receptions where the stage is a central focal point
- Sightline advantage: Every audience member has proximity and sightlines to the stage
- AV integration: Very challenging; any video screens or lighting create dead zones for some audience members
- Speaker comfort: The speaker is exposed from all sides, creating a more vulnerable feeling
In-the-round stages work best for more intimate corporate events. They're rarely used for complex AV-heavy productions because the technical requirements conflict with the scenic design.
Custom/Modular Configurations
Many corporate events use custom stage configurations:
- Split or dual-stage: Two separate stage areas allow for panel discussions with clear visual separation, or transitions between speakers without stage "dead time"
- Island stage: A center platform with audience surrounding on multiple sides but not fully in-the-round
- Riser configuration: Multiple elevation levels creating visual hierarchy and variety
- Open floor plan: Minimal formal stage, with speakers positioned on risers or raised platforms integrated into the floor
Custom configurations are designed specifically for the event content and venue. They require more sophisticated design and installation but often create more engaging events because the format is tailored to the actual content.
Integrating AV into Stage Design
Professional stage design and AV production must be coordinated from the earliest design stages. This integration is what separates stage design that looks impressive from stage design that actually works technically during the live event. bb Blanc's integrated approach to stage design ensures every element serves both aesthetic and functional purposes.
Screen Placement and Resolution Requirements
Video display placement is one of the most consequential stage design decisions:
- Upstage positioning: (video behind the speaker): Communicates authority and creates layered visual interest. Requires sufficient brightness to compete with stage lighting (typically 2,000+ nits for professional corporate events). The AV team must be consulted early because upstage positioning creates camera blocking challenges and requires specific lighting grid space.
- Flanking positions: (large screens to the left and right of the stage): Maximizes viewing angles, but creates visual competition with the speaker. Stage designs with flanking screens require careful sizing (too large and they dominate; too small and audience in the center sees partial content). This choice requires AV team input on sightline angles and content formatting.
- Projection mapping on scenic elements: Projects video content onto shaped surfaces (scenic pieces, architectural elements) for more integrated visual design. Requires specialized mapping software and careful calibration. Stage design implementations using projection mapping need designer and AV director collaboration from concept phase.
- In-the-floor displays: LED video displays recessed into the stage floor, visible to audience but not interfering with sightlines of speaker. Requires structural engineering to accommodate the recessed installation and ensure weight distribution is safe.
- AV cable routing and power distribution: Professional stage design plans how AV cables, power, and network infrastructure are hidden from audience view during the design phase, not as an afterthought during installation.
The choice depends on content priority (is the video content primary or supporting?), speaker presence requirements (is the speaker presence more important than content?), and venue constraints (sightline geometry). For your stage design, the AV director should review all screen placement options and provide input on technical feasibility and integration.
Lighting Design Coordination
Stage lighting and scenic design must work together:
- Lighting grid: Existing venue lighting may be limited or non-existent. Custom lighting rigs require structural support and electrical capacity
- Lighting positions: Professional stage lighting requires positions upstage, downstage, sides, and above. Scenic design must accommodate these positions without blocking light paths
- Color and contrast: Lighting design must ensure speakers are visible and detailed against the scenic backdrop; poor contrast makes speakers appear flat
- Special effects and mood: Lighting supports the emotional tone of the event (formal presentations are brightly lit; keynote addresses might use dramatic side lighting)
For comprehensive stage design services that integrate all AV and production elements, explore Design and Creative Services
Related reading: Creative Stage Decoration Ideas for Corporate Events with Cutting-Edge AV Solutions
Related reading: Event Production Company Toronto: How to Choose a Partner
Audio System Integration
While typically less visual than screens and lighting, audio system integration affects stage design:
- Speaker placement: PA system speakers must be positioned to cover the audience area without feedback or dead zones
- Microphone positioning: Microphone stands, lavalier mic receivers, and monitor speakers must be accommodated in the stage design
- Cable management: Professional stage design includes dedicated cable routing that's hidden from audience view
- Feedback prevention: Acoustic characteristics of the stage (reflective surfaces, curved shapes) can amplify or reduce feedback risk
Power and Data Infrastructure
Behind-the-scenes, the stage design must accommodate extensive technical infrastructure:
- Power distribution: Multiple 20-amp circuits, sometimes 30-50 amp service for large LED or lighting installations
- Network connectivity: Cat6 or fiber optic network infrastructure for networked AV systems
- Cable routing: Conduits, cable trays, or floor boxes that keep cables organized and hidden
- Redundancy: Professional productions include backup power and network to prevent total system failure if a single component fails
The best stage designs plan infrastructure routing during design phase, not as an afterthought during installation.
Toronto Venue Considerations for Stage Design
Toronto's diverse event venues each present unique requirements for stage design in corporate events. Understanding these venue-specific challenges is essential for successful execution:
Hotel and Ballroom Venues
Toronto's major hotels (Fairmont Royal York, Intercontinental, Trump Tower, etc.) host most corporate events:
- Ceiling heights: Most hotel ballrooms have 10-12 foot ceilings, which limits vertical scenic elements and lighting positions. Stage design in these venues must work within tight vertical constraints.
- Load limitations: Floor load capacity is typically 100-150 psf. Heavy scenic elements (LED, rigging infrastructure, complex structures) may require load distribution planning or floor reinforcement.
- Existing infrastructure: Hotel venues have existing lighting grids, power distribution, and networking. Stage design should integrate with these systems rather than working around them.
- Flexible wall systems: Hotel ballrooms often have removable partitions. Stage design must account for wall positions and potential changes if multiple sessions are scheduled.
Venue-Specific Adaptation
The most effective stage design in Toronto hotels accounts for:
- Architectural ceiling treatment: Rather than fighting the low ceiling, some stage designs incorporate the ceiling as part of the design (using uplighting, ceiling elements, or open designs that don't require high clearance).
- Load distribution strategies: Instead of one central heavy structure, distributing weight across multiple points or using lighter materials (acrylic instead of solid structures, fabric instead of heavy scenic pieces).
- Integration with existing rigging: Rather than adding new rigging infrastructure, stage design that uses existing venue rigging reduces cost and installation time.
Outdoor Toronto Venues
For stage design corporate events at Toronto outdoor venues (Nathan Phillips Square, Harbourfront, etc.):
- Weather protection: Permanent or temporary weather protection becomes part of the design. Stage design corporate events cannot rely on clear skies in Toronto's climate.
- Wind loading: Outdoor structures must be engineered for Toronto wind speeds. Tall scenic elements or fabric elements require proper engineering and ballasting.
- Lighting for outdoor events: Outdoor daylight varies throughout the day. Stage design corporate events must account for directional sunlight and time-of-day variations, or use artificial lighting sufficient to overcome daylight.
Scenic Elements: Set Pieces, Backdrops, and Branded Environments
Beyond the basic stage structure, scenic elements create visual interest and reinforce brand messaging.
Branded Set Pieces
Custom-fabricated elements that incorporate the brand identity:
- Large-format 3D letters or logos: Company name or event branding as dimensional scenic elements
- Architectural sculptures: Abstract shapes or architectural references that reinforce the event theme
- Textural elements: Layered materials (wood, metal, fabric) that create visual depth and sophistication
- Interactive elements: Scenic pieces that audience members can engage with (touch, walk through, photograph)
These elements should feel intentional and integrated, not like decorative afterthoughts. The best branded set pieces use scale and proportion to command visual attention.
Backdrops and Cycloramas
What's behind the speaker matters:
- Fabric cyclorama: Smooth curved fabric backdrop (typically white or neutral) that creates visual simplicity and focuses attention on the speaker
- Printed backdrop: Large-format printed graphics that display brand messaging, event theme, or sponsor information
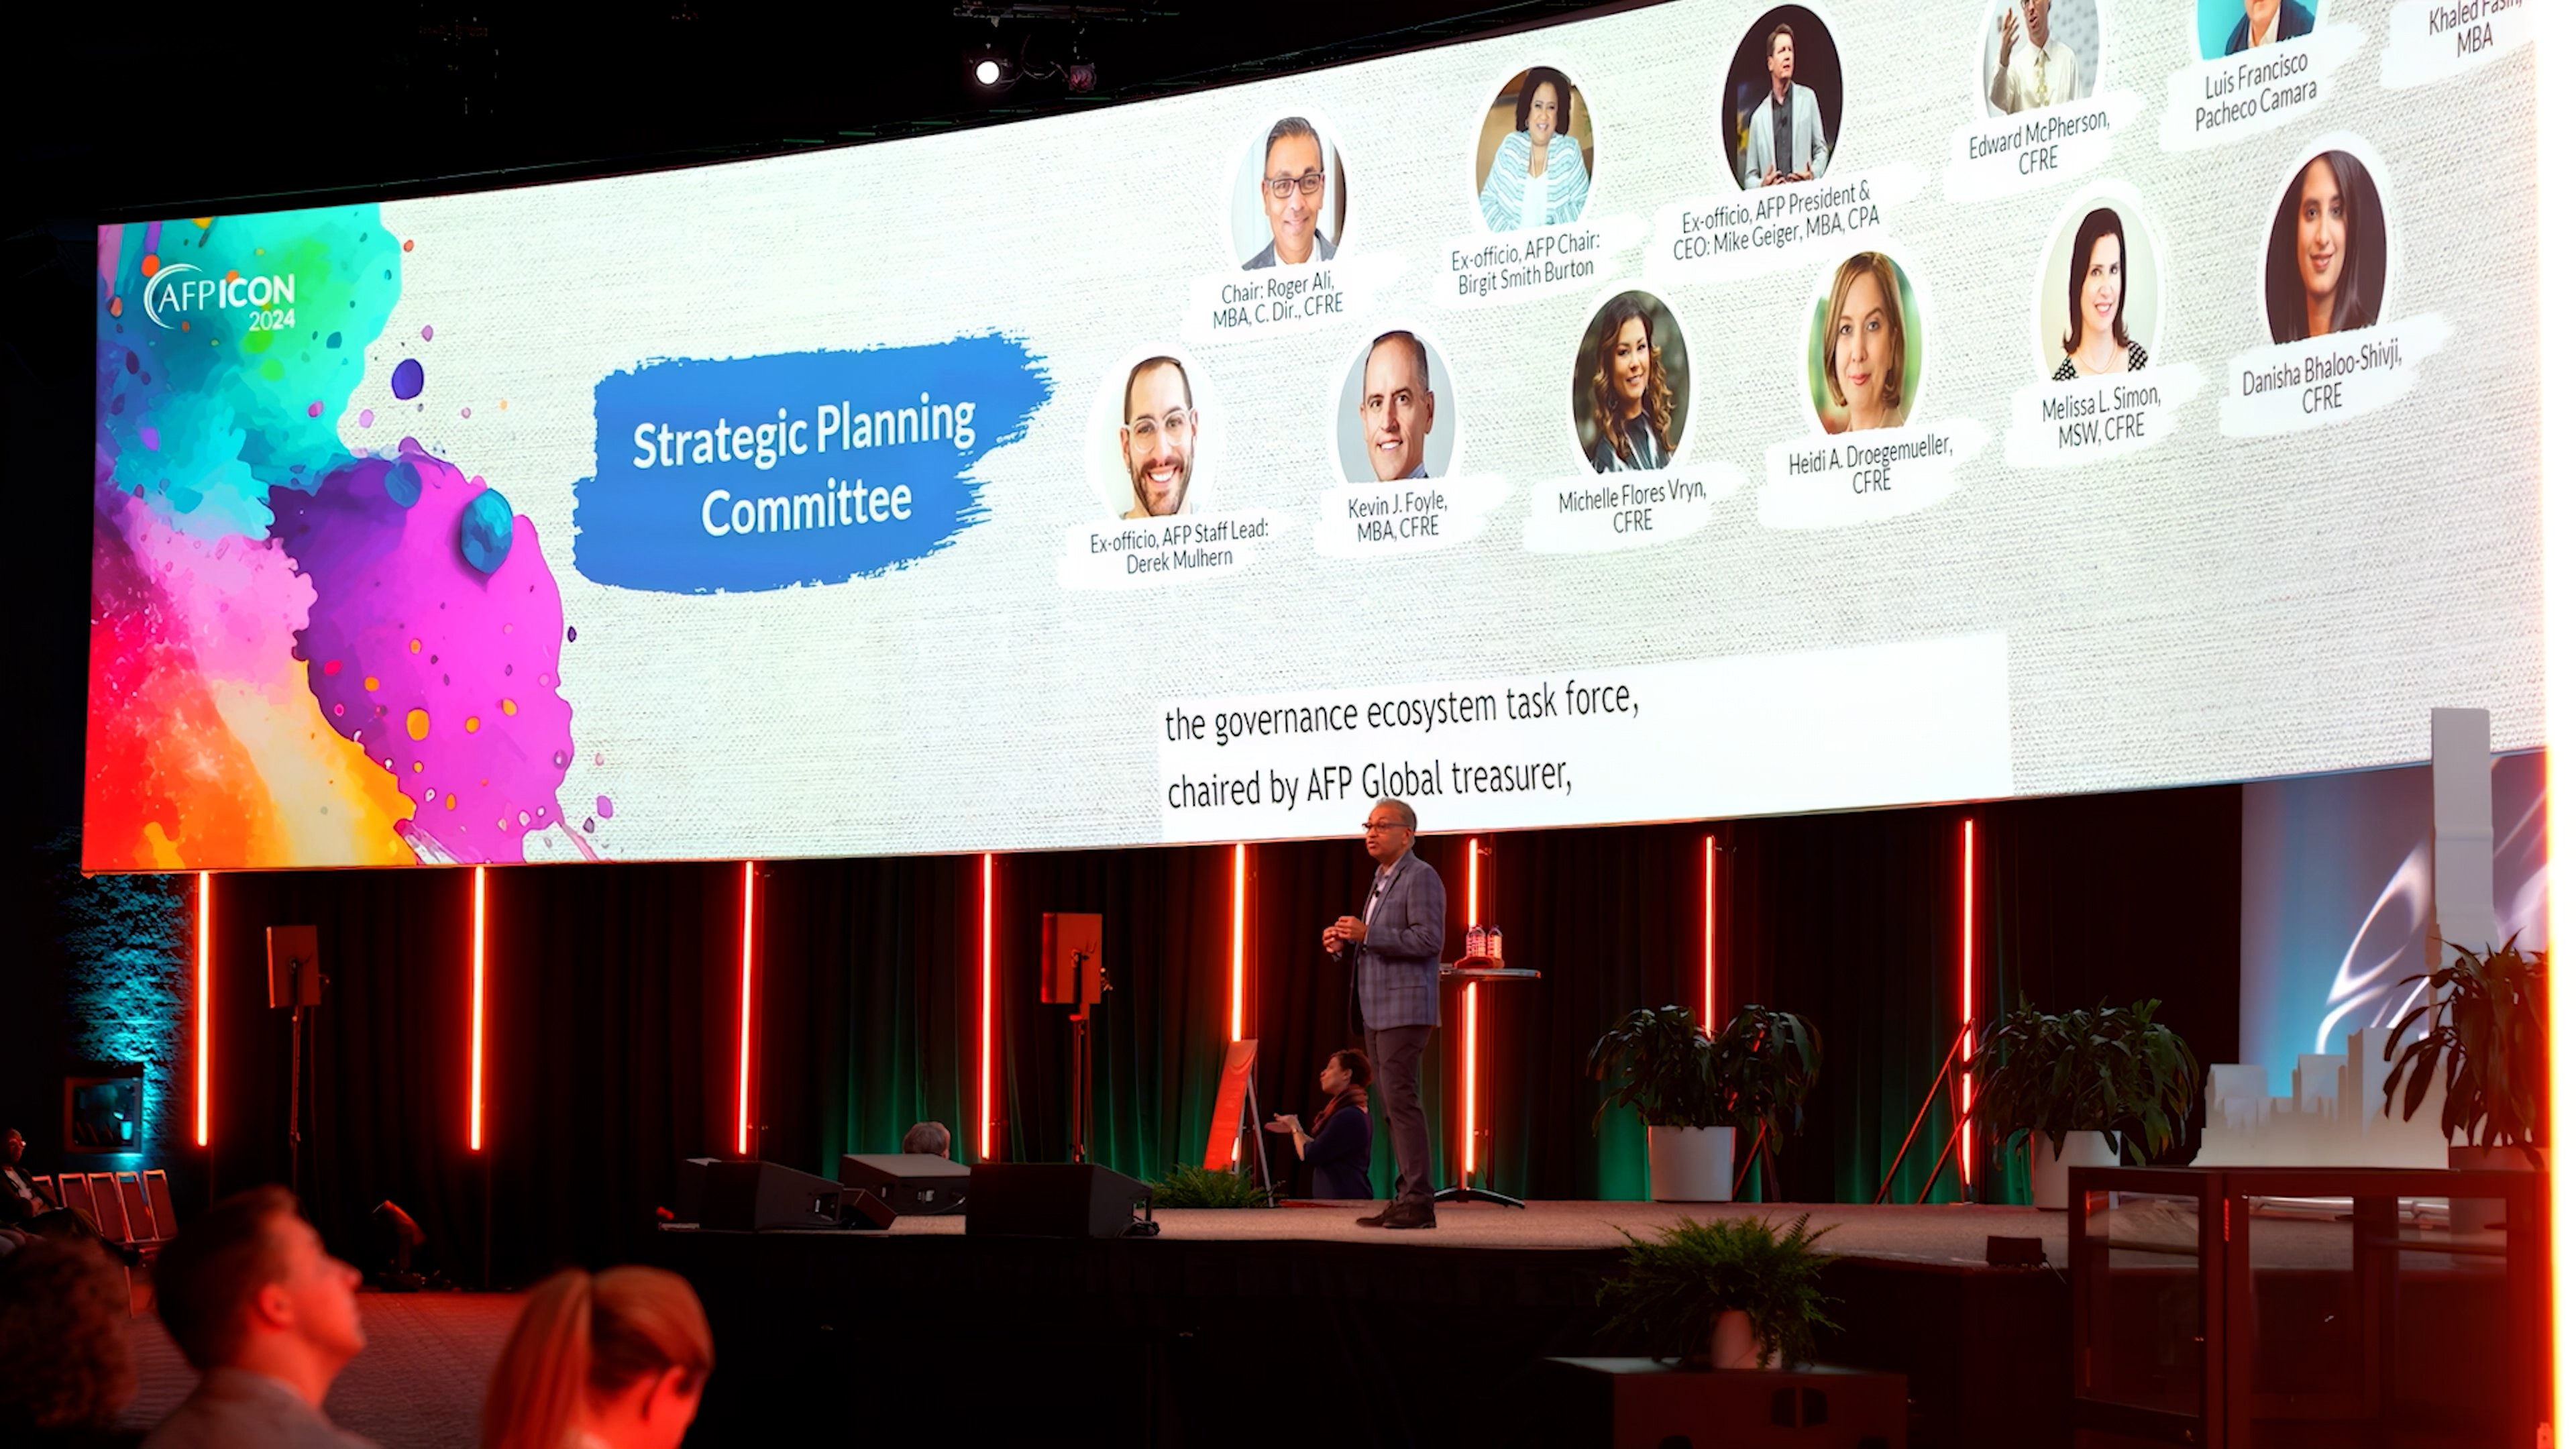
- Dynamic backdrop: LED video walls that display content, changing throughout the event to support different speakers or segments
- Textured backdrop: Layered or dimensional backdrops that create visual interest without distraction
The choice of backdrop depends on speaker prominence vs. content balance. A speaker-focused event might use a simple white cyc. A content-heavy event might use dynamic LED backdrop.
Branded Environment and Spatial Design
For multi-space events, the entire stage and surrounding space becomes a branded environment:
- Entry experience: The approach to the stage creates first impressions; branded elements here set tone before the speaker even speaks
- Visible infrastructure: Professional events hide infrastructure (cables, speaker stands, equipment). The scenic design must accommodate this.
- Spatial flow: If the event has multiple stations or stages, the scenic design guides audience movement and flow
- Photo opportunity zones: Branded areas specifically designed for audience photography and social media sharing
The best branded environments feel cohesive—every visible element (stage, signage, entry, speaker area, audience seating) reinforces the same visual language.
Stage Safety, Structural Engineering, and Load Requirements
Professional stage design requires structural engineering expertise and strict adherence to safety codes.
Structural Load Calculations
Every scenic element has weight, and that weight must be supported:
- Floor load capacity: Venues have maximum pounds-per-square-foot (psf) capacity. A typical ballroom might be 100-150 psf. Heavy scenic elements (LED video walls can weigh 50+ pounds per square foot) may exceed venue capacity without reinforcement
- Vertical support structures: If the scenic design requires trusses or overhead structures, these must be properly engineered and anchored to support all hanging loads
- Rigging calculations: Any elements hung from the ceiling must be designed by licensed structural engineers using proper hardware and load ratings
- Factor of safety: Professional standards typically require structures to be engineered for 2-4x the actual load (so if a scenic element weighs 1,000 pounds, it's engineered to support 2,000-4,000 pounds)
These aren't optional considerations—they're legal and safety requirements.
Installation Safety and Access
Even once engineered, installation procedures must be safe:
- Adequate clearance: Installation crews need space to work safely; scenic design must accommodate this
- Equipment for installation: Lifts, rigging equipment, and technical crew require proper training and certifications
- Emergency egress: All audience members must have clear paths to exit in case of emergency. Scenic design cannot obstruct emergency egress routes.
- ADA accessibility: Accessible routes to and around the stage must be maintained; scenic design cannot create barriers
Venue Coordination and Approvals
Venues have specific requirements and approvals needed before installation:
- Venue rules: Many venues have restrictions on what can be installed, weight limits, rigging limitations, and aesthetic requirements
- Building codes: Different jurisdictions have different building and fire codes
- Insurance requirements: Event insurance policies may have specific requirements for stage design, rigging, and safety
- Venue technical staff: Professional venues have technical staff who must approve the design and be involved in installation
Professional stage design includes venue coordination and approval processes as part of the planning.
Good stage design execution balances aesthetic vision, technical feasibility, structural safety, and practical installation logistics. The best stage designs feel inevitable—like they couldn't have been designed any other way. That inevitability is the result of meticulous planning, not luck.
Ready to discuss your next event?
Contact bb Blanc to start the conversation with our production team.
FAQ
How much should we budget for custom stage design? Stage design budgets vary dramatically based on complexity and venue. A simple paint treatment of an existing stage might be variesK-5K. A more substantial scenic installation with custom fabrication typically runs variesK-50K+ depending on scale. LED integration adds significant cost. Professional stage design should be 15-a significant portion of the budget event production budget. The focus should be on proportional impact: what design choices create maximum audience impact relative to investment?
Can we reuse stage designs for multiple events? Absolutely. Modular stage designs can be reconfigured and reused, which spreads the design cost across multiple events. The key is designing with modularity in mind from the beginning. Fully custom, one-off designs are expensive because all the cost is absorbed by a single event. If you're planning multiple events over a year or multiple years, designing for reuse makes economic sense.
How long does the stage design and fabrication process typically take? From initial concept to installed stage: 6-10 weeks for a standard event. This includes 2-3 weeks conceptual development, 1-2 weeks approval and refinement, 2-3 weeks fabrication, and 1-2 weeks installation. Expedited timelines (less than 6 weeks) are possible but increase costs and risk. Very complex designs might require 12+ weeks. Build time into your event planning calendar.
What's the difference between scenic design and set design? These terms are often used interchangeably, but technically: scenic design is the overall environment design (the stage, backdrop, spatial relationship to audience). Set design is the specific furnishings and objects on stage. For corporate events, we typically think of them together as stage design—the complete visual environment the audience sees.
Do we need a professional stage designer, or can we DIY stage design? You can absolutely design a stage yourself if you have basic design and fabrication skills. But professional stage designers understand sight lines, structural engineering, AV integration, and brand communication in ways that self-designed stages typically miss. For stage design corporate events with significant importance or visibility, professional design pays for itself through better results and fewer installation surprises. For simpler internal events, DIY is perfectly reasonable.
How do we ensure stage design corporate events integrates properly with AV systems? The key is early collaboration between the stage designer and AV director. During the design phase, the AV director should review all screen placements, lighting positions, cable routing, and power requirements. During the 3D rendering phase, incorporate lighting simulations that show how the stage design looks under actual event lighting. During the construction phase, coordinate fabrication timelines with AV equipment delivery. During load-in, conduct a full AV integration test before the actual event. Late-stage AV surprises are expensive and stressful—early integration prevents them.
What's the typical timeline for professional stage design corporate events from concept to installed stage? Minimum 10-14 weeks for a standard stage design corporate events: 2-3 weeks conceptual development, 2 weeks design development and rendering, 2-3 weeks approval and refinement, 2-3 weeks fabrication, and 1-2 weeks installation and technical verification. Expedited timelines (less than 10 weeks) are possible but increase costs and risk. Complex stage designs with significant AV integration, custom fabrication, or structural engineering may require 16-20 weeks. Plan accordingly in your event calendar.
How do we measure the ROI of a stage design corporate events investment? Measure through multiple metrics: audience perception (post-event surveys asking about professionalism and visual impact), speaker effectiveness (does the stage design support or detract from speaker message?), content clarity (can audiences read signage, see screens, understand the visual hierarchy?), and business outcomes (lead generation, attendee satisfaction, social media engagement with photos/videos of the stage). The best stage design corporate events feels purposeful and intentional, not expensive or overdone. If the audience doesn't consciously notice the design but feels that the environment supports the event message, the design has succeeded.
How do we ensure the stage design doesn't overshadow the speaker? The key principle: the stage design should support the speaker, not compete with them. This means careful use of color (neutrals rather than bright colors behind the speaker), appropriate scale (not so large that it dwarfs the speaker), and restraint with animation or video content when speakers are talking. Good stage design is usually invisible—the audience doesn't consciously notice the design, they just feel that the environment supports the communication.

